Biscuit comes with built-in payment support. The platform handles the Stripe relationship and infrastructure for you, so you don’t need a separate account, API keys, or developer time to wire it up. You describe the payment model you want in chat (credit packs, subscriptions, one-time purchases), and Biscuit configures the pricing, the checkout, and the in-app payment buttons.
The setup runs end-to-end in a single chat session.
How payments work in Biscuit
Payments run through Stripe Checkout. Your app shows users a checkout page labeled “Payment for [Your App], processed by Biscuit”. Biscuit is the merchant of record, which is what enables the day-one setup. The platform handles the Stripe account, the API keys, and the compliance work that would otherwise need its own engineering investment.Setting up your first payment flow
1
Open Payments in the side nav
Once your app is built, the side navigation shows more options including Payments. Click into it. You’ll see a Set up payments action.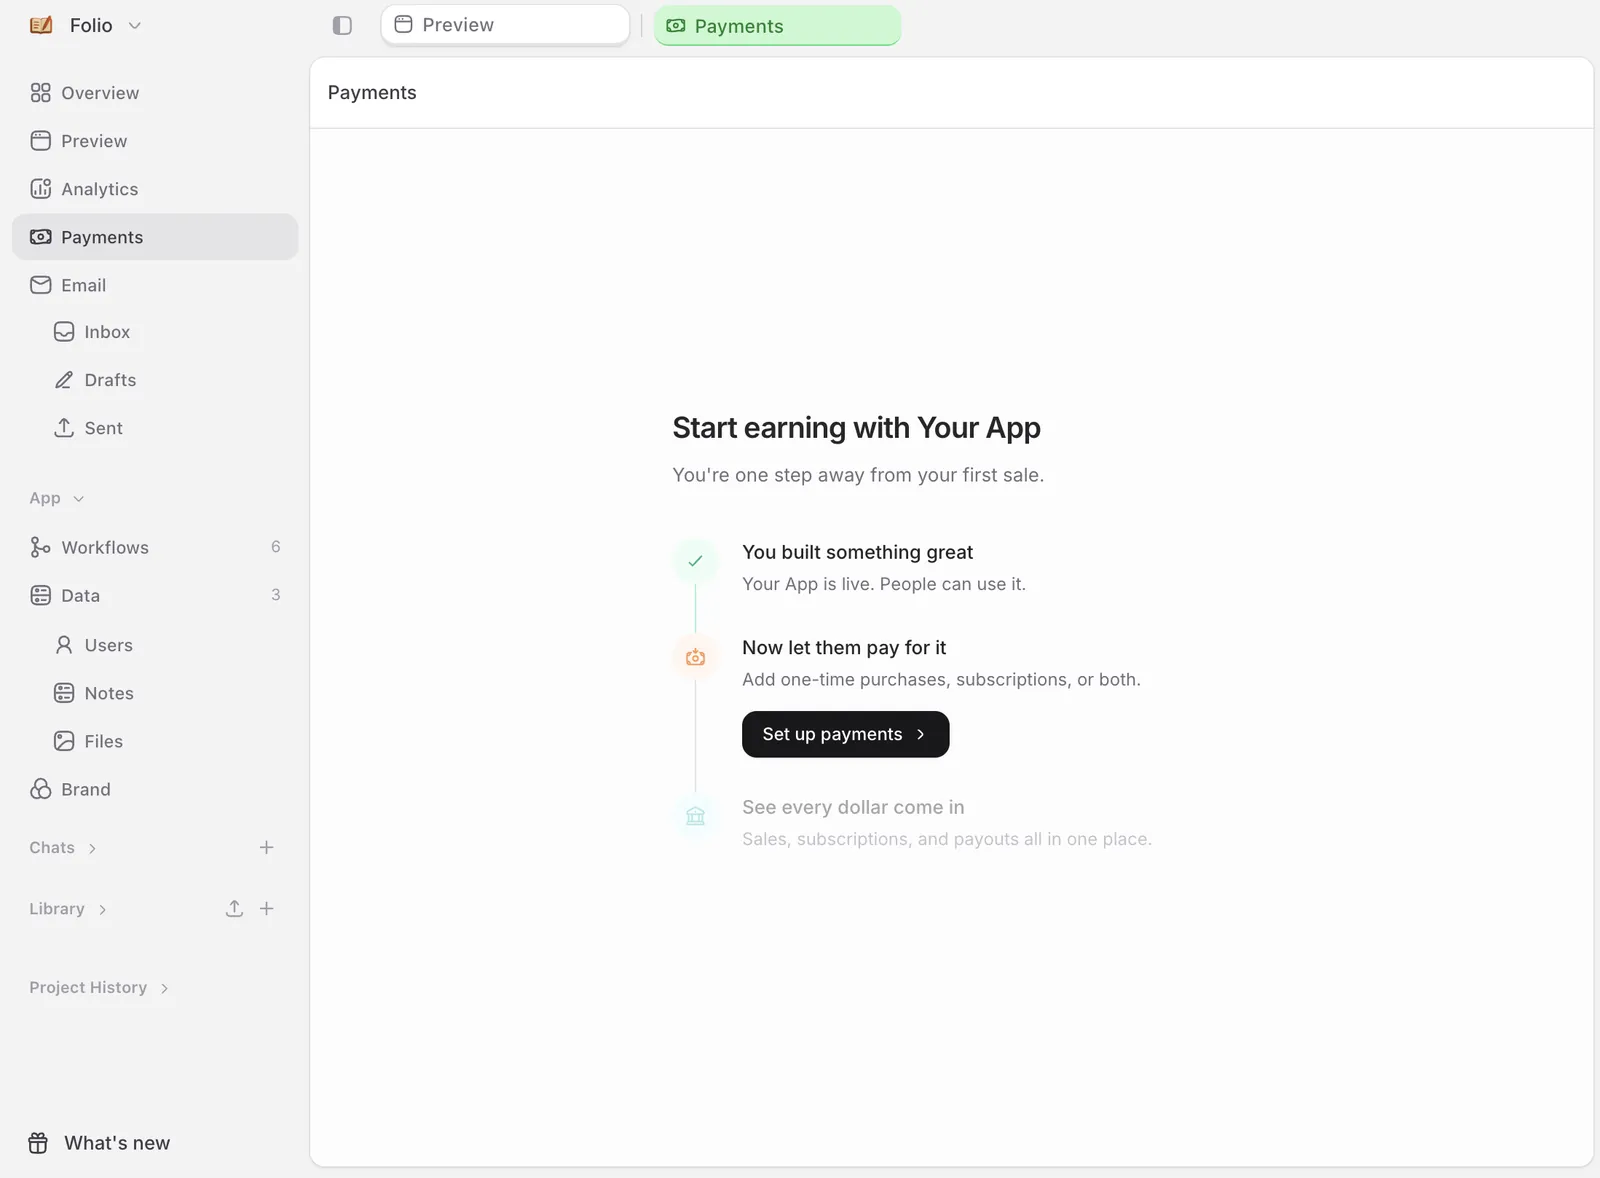
2
Click Set up payments
This opens a chat pre-loaded with monetization ideas tailored to your app: credit packs, subscriptions, one-time purchases.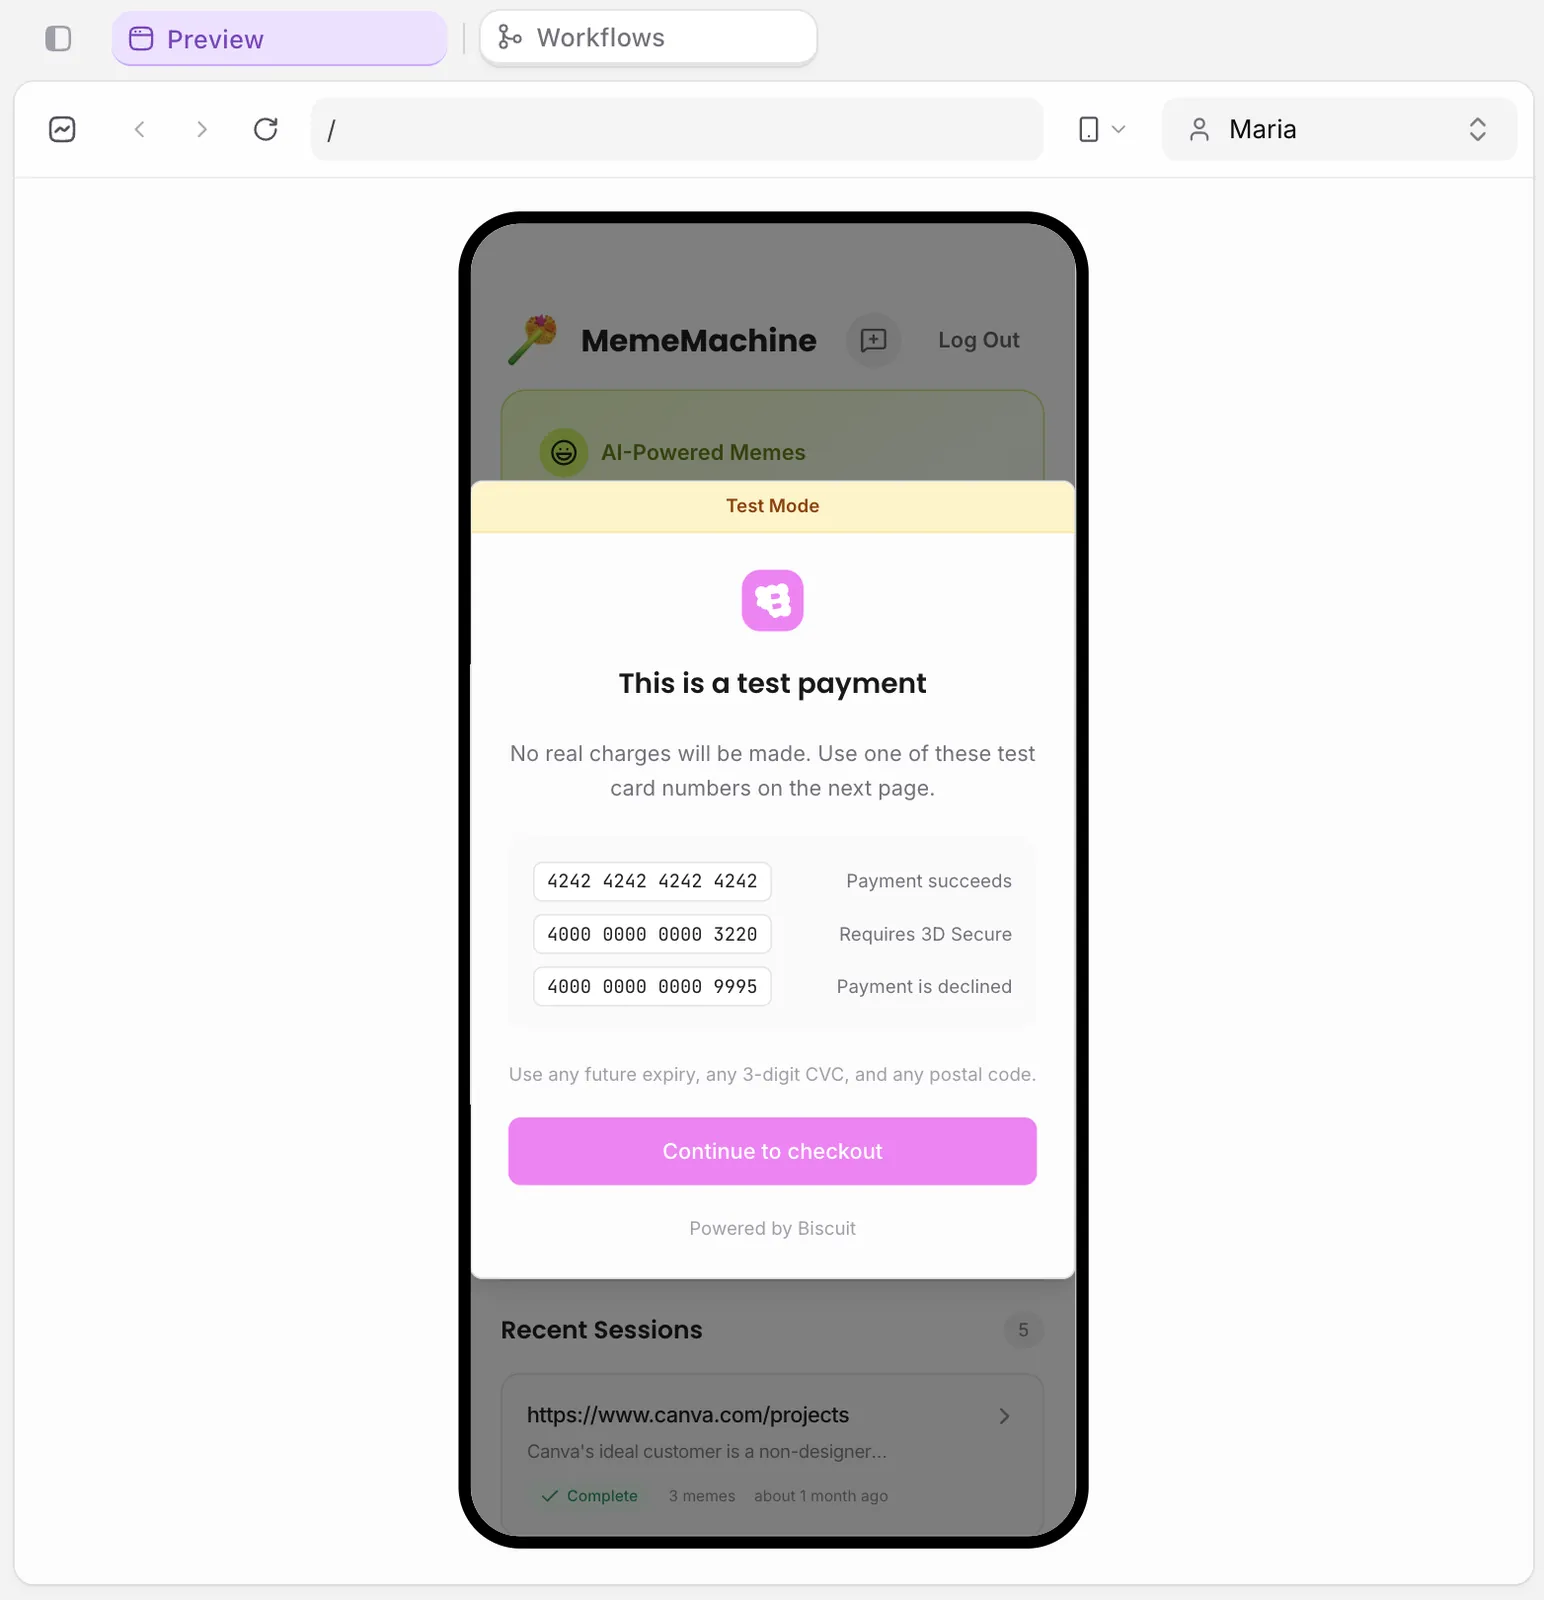
3
Pick a payment model and prompt the details
Type what you want. Examples: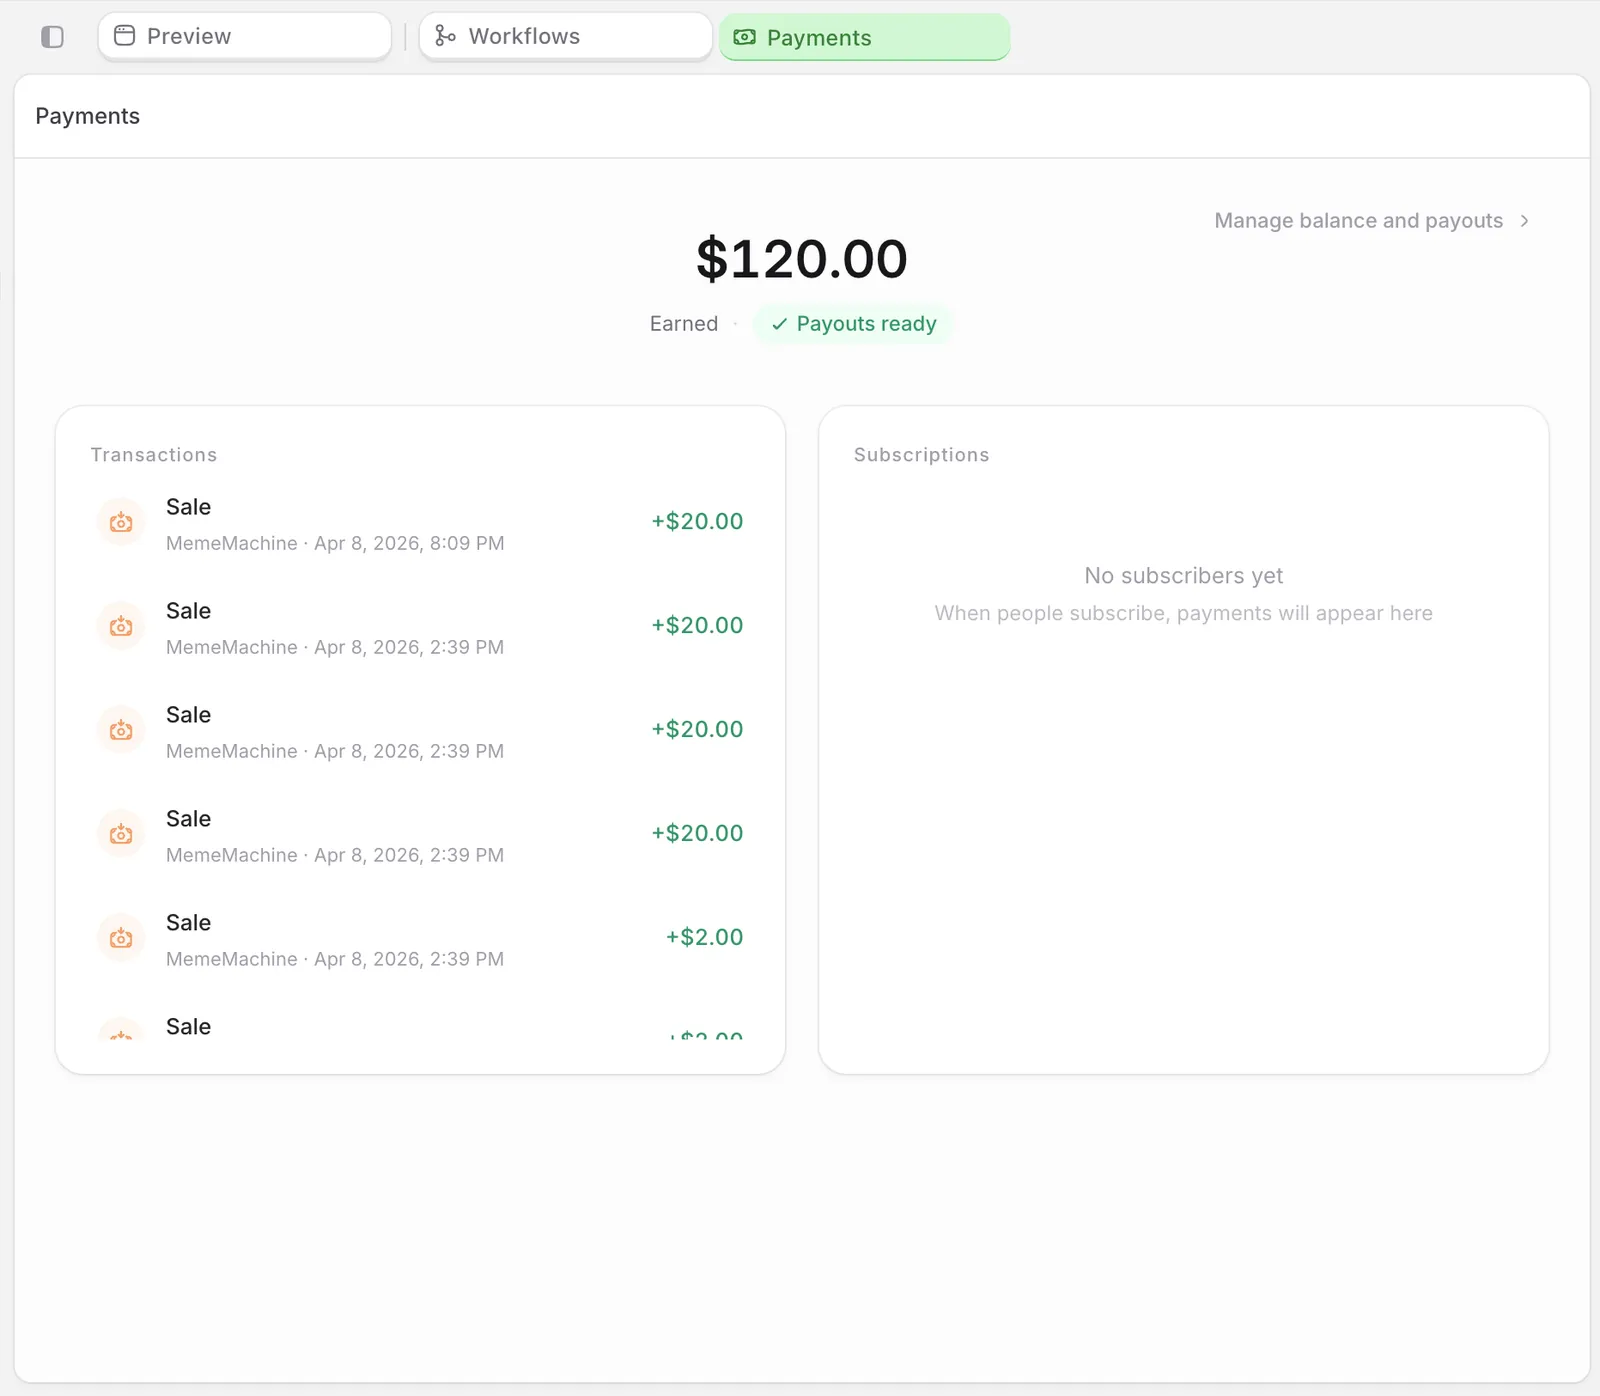
- “I want credit packs with 10 credits for $2”
- “Set up a Pro tier in my app at $9 per month”
- “Add a one-time purchase of $5 for the premium template pack”
4
Test the checkout
Use the preview’s test mode. Click your payment button, complete a fake card flow, and check the credit balance updates and the buy-button enables and disables correctly.
5
Publish the app
Click Publish in the top-right. Biscuit’s safety check confirms the payment setup before your app goes live.
6
Take a real payment
Open the live URL, sign in as a user, and run a real transaction. Stripe’s checkout takes the card, Biscuit handles the integration.
7
See the payment land
Back in your project, click Payments in the side nav. Every transaction appears here.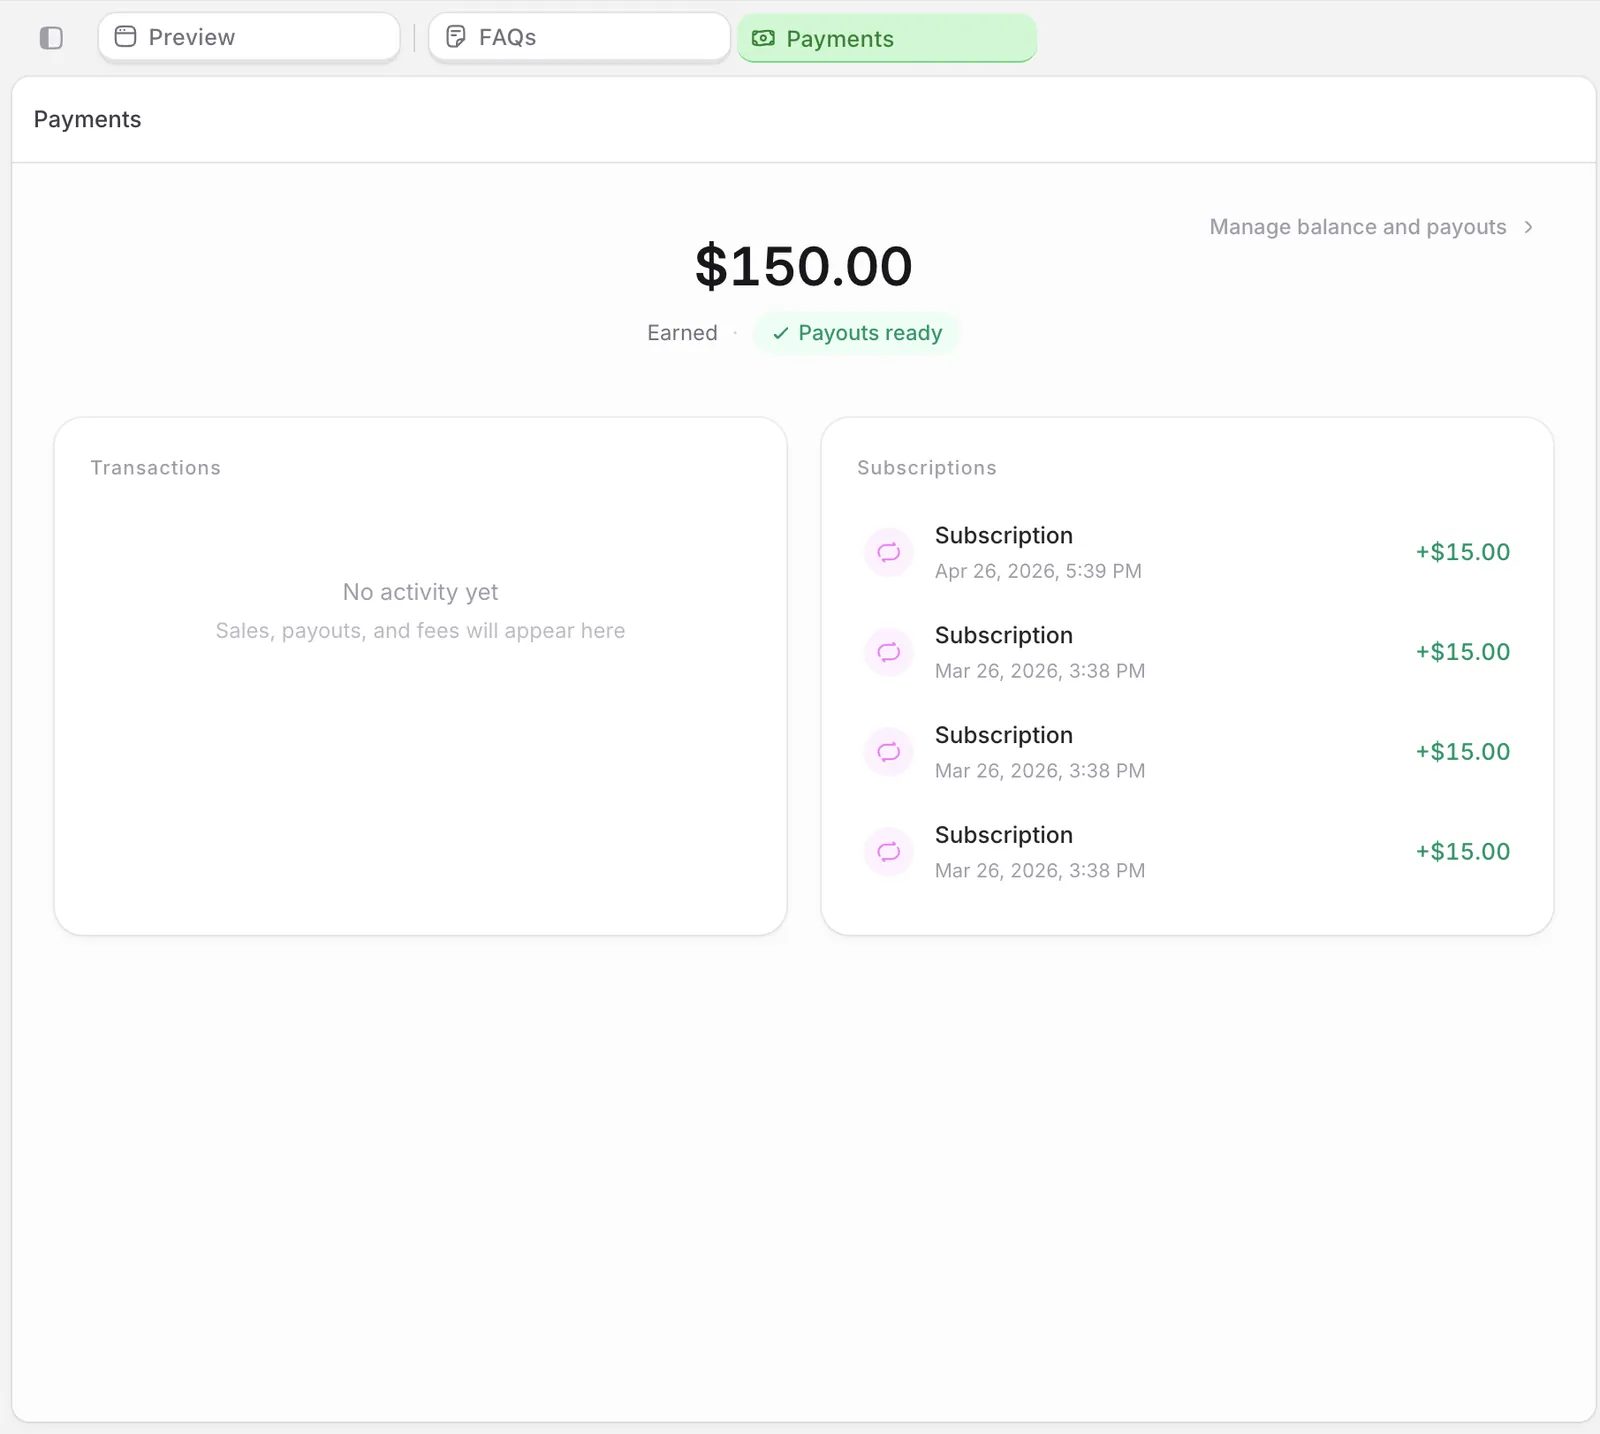
FAQ
Why can't I complete the checkout?
Why can't I complete the checkout?
Confirm you’re on the live URL, not the preview. Test mode and live mode use different Stripe environments.
Why doesn't a successful payment show up in Payments?
Why doesn't a successful payment show up in Payments?
Refresh the page. New payments take a few seconds to land.
Can I really launch a paying product on Biscuit?
Can I really launch a paying product on Biscuit?
Yes. Apps you publish run on production infrastructure, can connect to your own custom domain, and can take live payments from day one.
Up next
Sending emails
Trigger emails on signup, milestones, or schedules.
Build your first project
From prompt to a live app on a custom domain.