> ## Documentation Index
> Fetch the complete documentation index at: https://docs.biscuit.so/llms.txt
> Use this file to discover all available pages before exploring further.
# How to build and publish your first project
> Full walkthrough from sign-in to a live app on a custom domain. Covers prompts, the canvas view, sample data, testing, publishing, and DNS setup.
export const faqSchema = {
"@context": "https://schema.org",
"@type": "FAQPage",
"mainEntity": [
{ "@type": "Question", "name": "What if Biscuit builds something different from what I described?", "acceptedAnswer": { "@type": "Answer", "text": "Don't restart. Use chat to correct it (\"the homepage should show a list, not a grid\", \"remove the search bar\"). Each correction goes into the project history." } },
{ "@type": "Question", "name": "What if I can't find a feature I want?", "acceptedAnswer": { "@type": "Answer", "text": "Open chat and prompt for it. If the feature exists in Biscuit (payments, emails, workflows, custom domains, file uploads), Biscuit configures it. If it doesn't, Biscuit tells you." } },
{ "@type": "Question", "name": "Why isn't my custom domain connecting?", "acceptedAnswer": { "@type": "Answer", "text": "DNS usually propagates within minutes, but can take up to 48 hours. Check that the records at your domain provider match what Biscuit shows on the publish screen. If they do, give it time." } }
]
};
This walkthrough takes you from sign-in to a working app on your own domain. It covers signing in, describing what you want, watching the canvas build, picking layouts, adding data, testing, publishing, and connecting a custom domain.
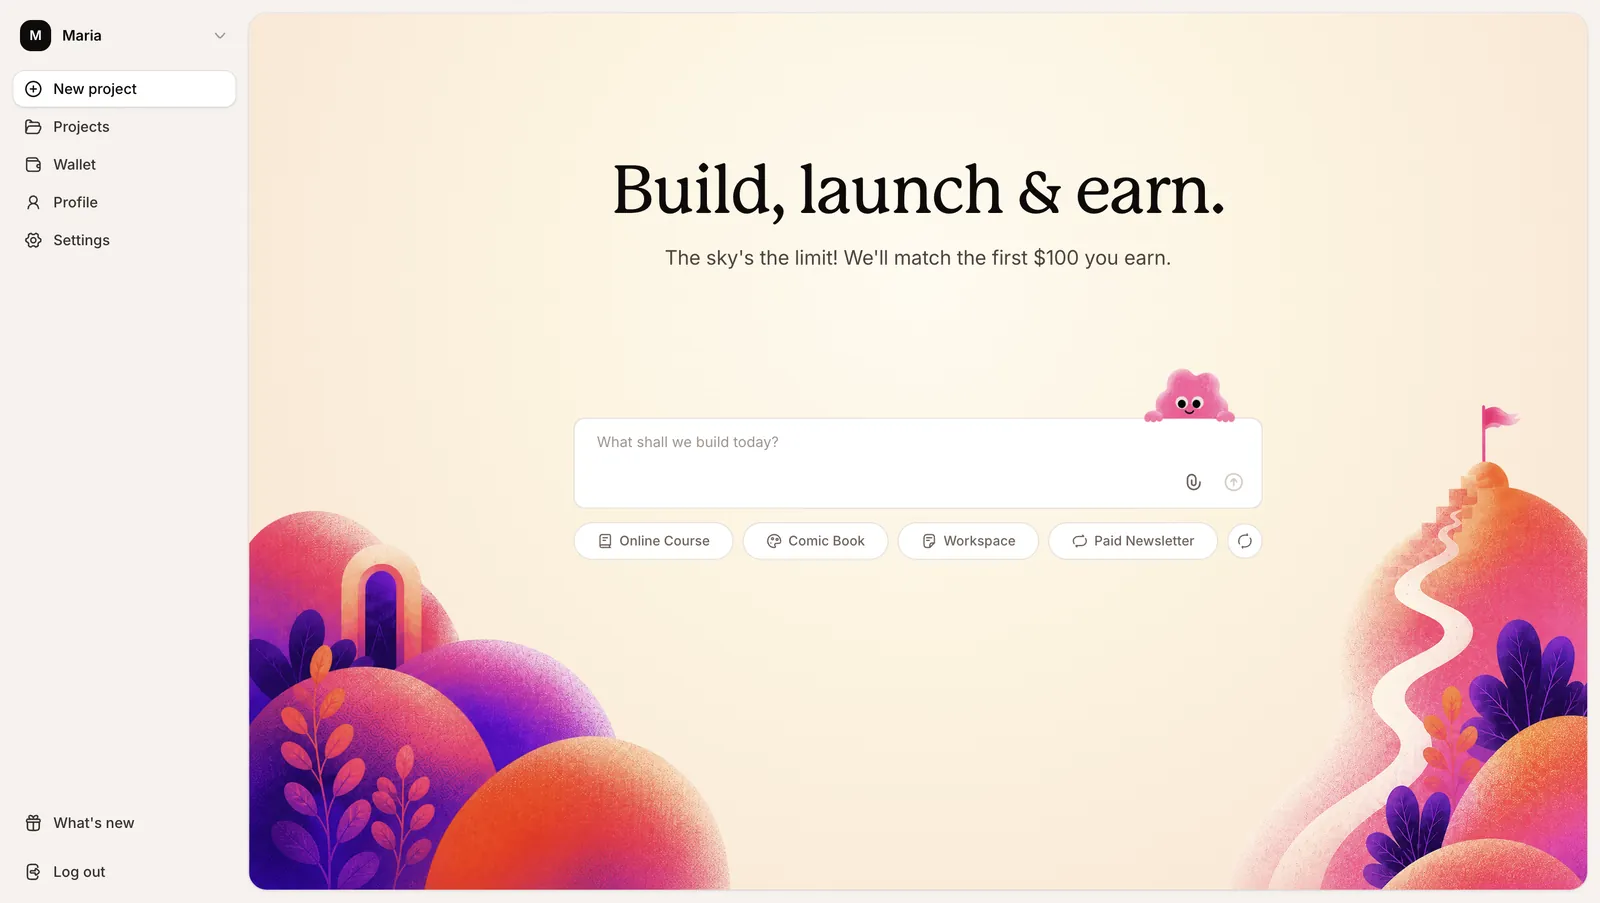
After your Biscuit account is created (and approved, in case you were added to the waitlist), you'll land on the Biscuit dashboard. If this is your first time, the dashboard will be empty.
Click *New Project*. The next screen is where you describe your app. If you have an idea, type it in. If you're exploring, pick one of the example apps under the prompt box.
If you have screenshots, PDFs, or a [blog post](https://www.biscuit.so/blog/one-shot-menugen) that describes the app you want, click the attach icon and upload them; Biscuit uses them as reference.
**Try this prompt**
```
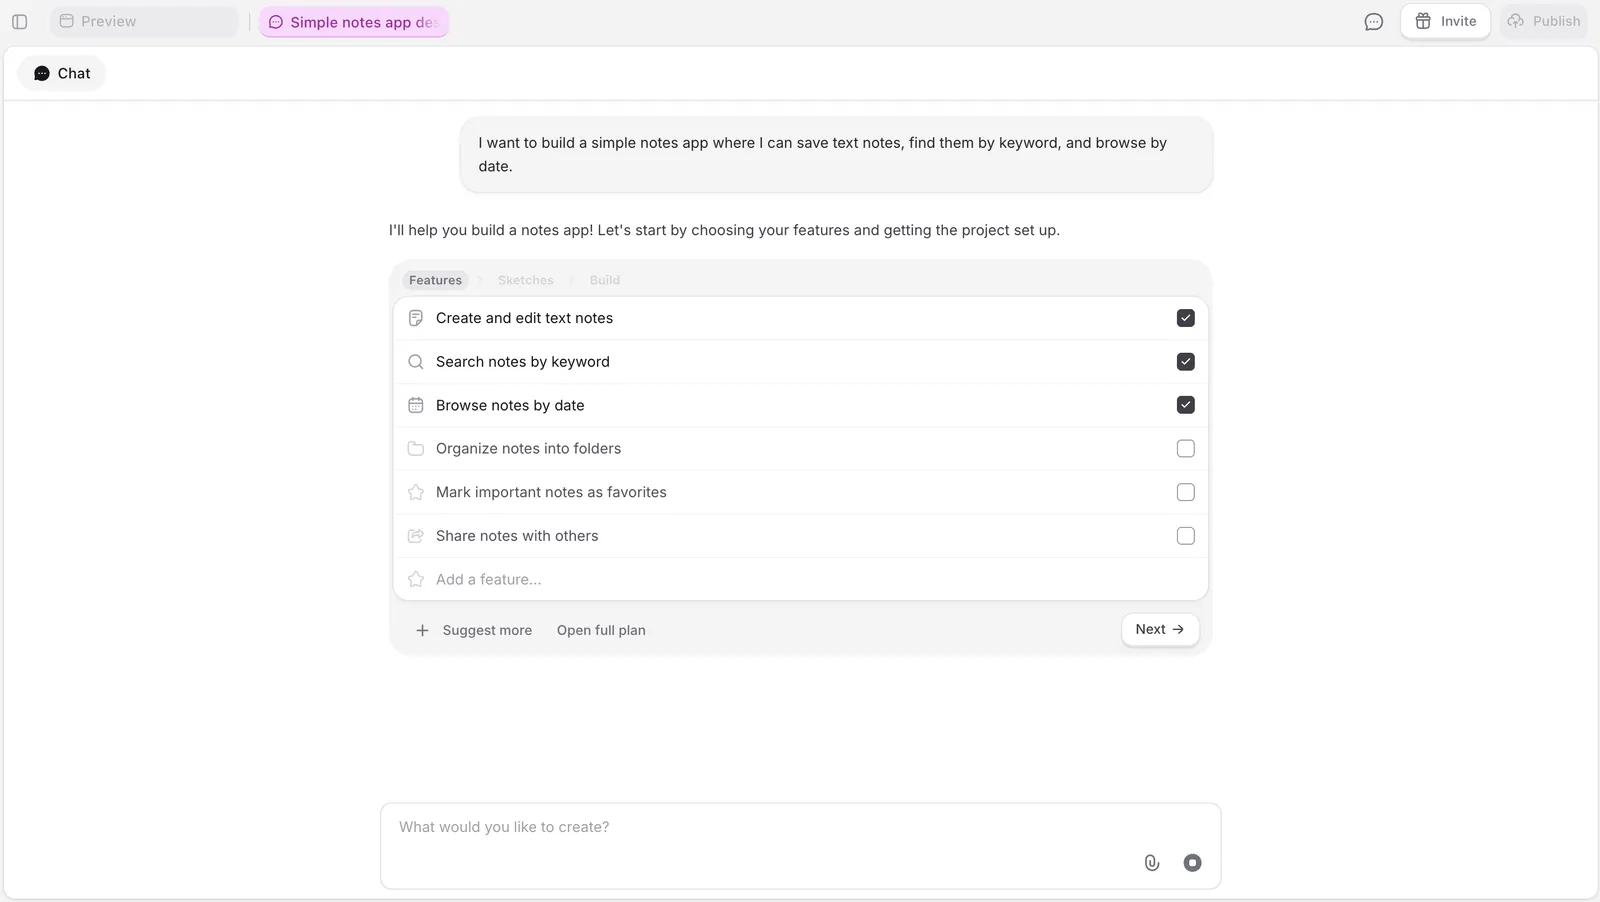
I want to build a simple notes app where I can save text notes, find them by keyword, and browse by date.
```
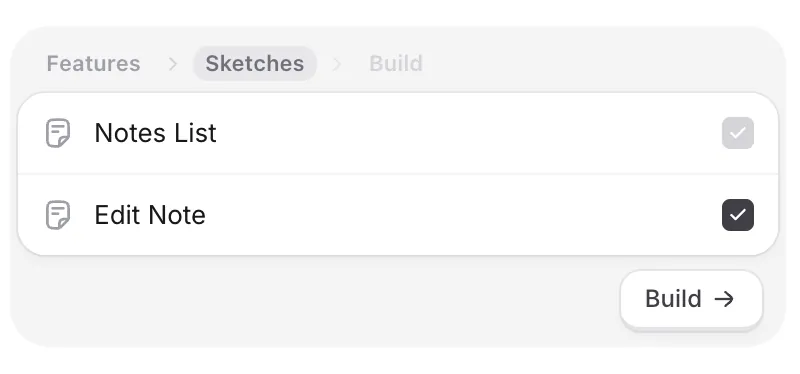
After you submit the prompt, Biscuit suggests a list of features. Check the ones you want, uncheck the ones you don't, click *Suggest more* if you want it to think of additional ideas, and write your own if you have some features in mind. Click *Next* when you're happy with the list.
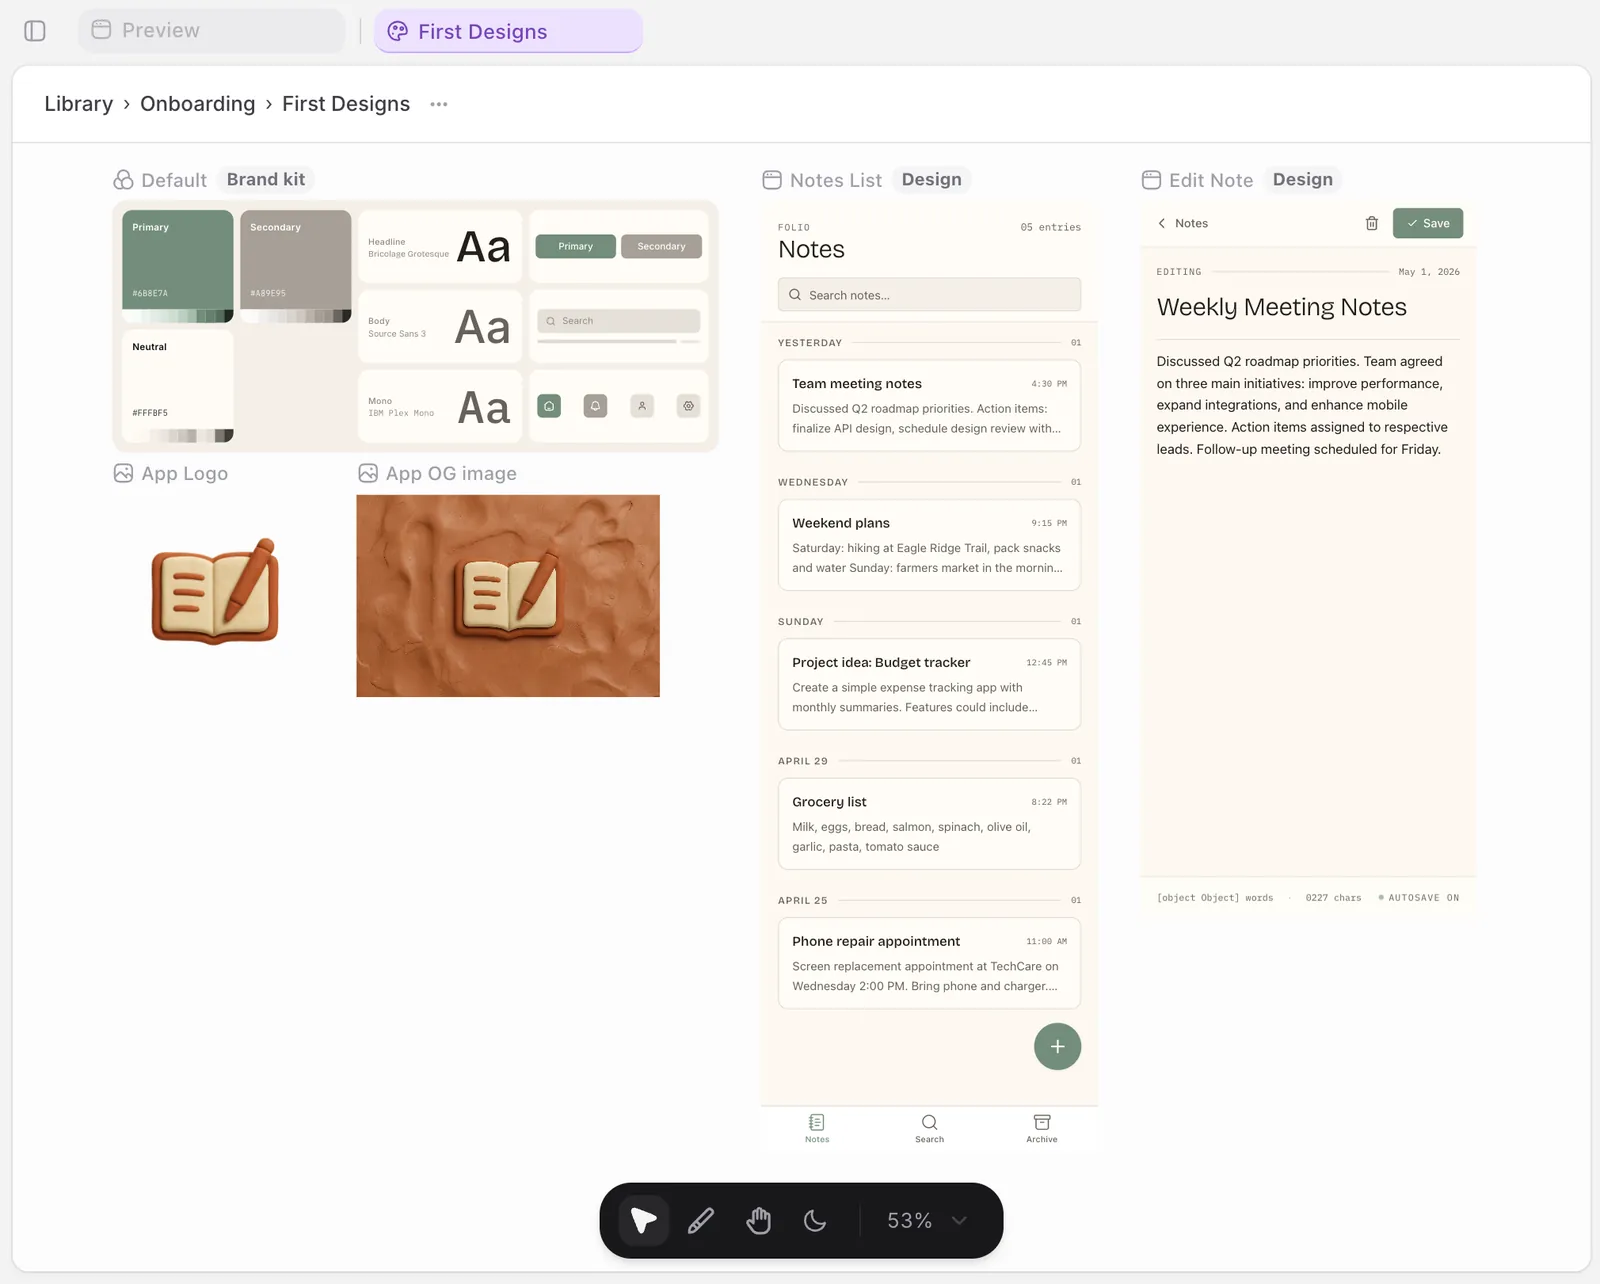
The canvas is your sketch view. Biscuit lays out each screen of your app as a frame on the canvas. Use this phase to explore the design before you commit.
To make a change, click *Edit*, select a UI component, and prompt the change ("remove this", "make the buttons bigger", "use a darker color for the header").
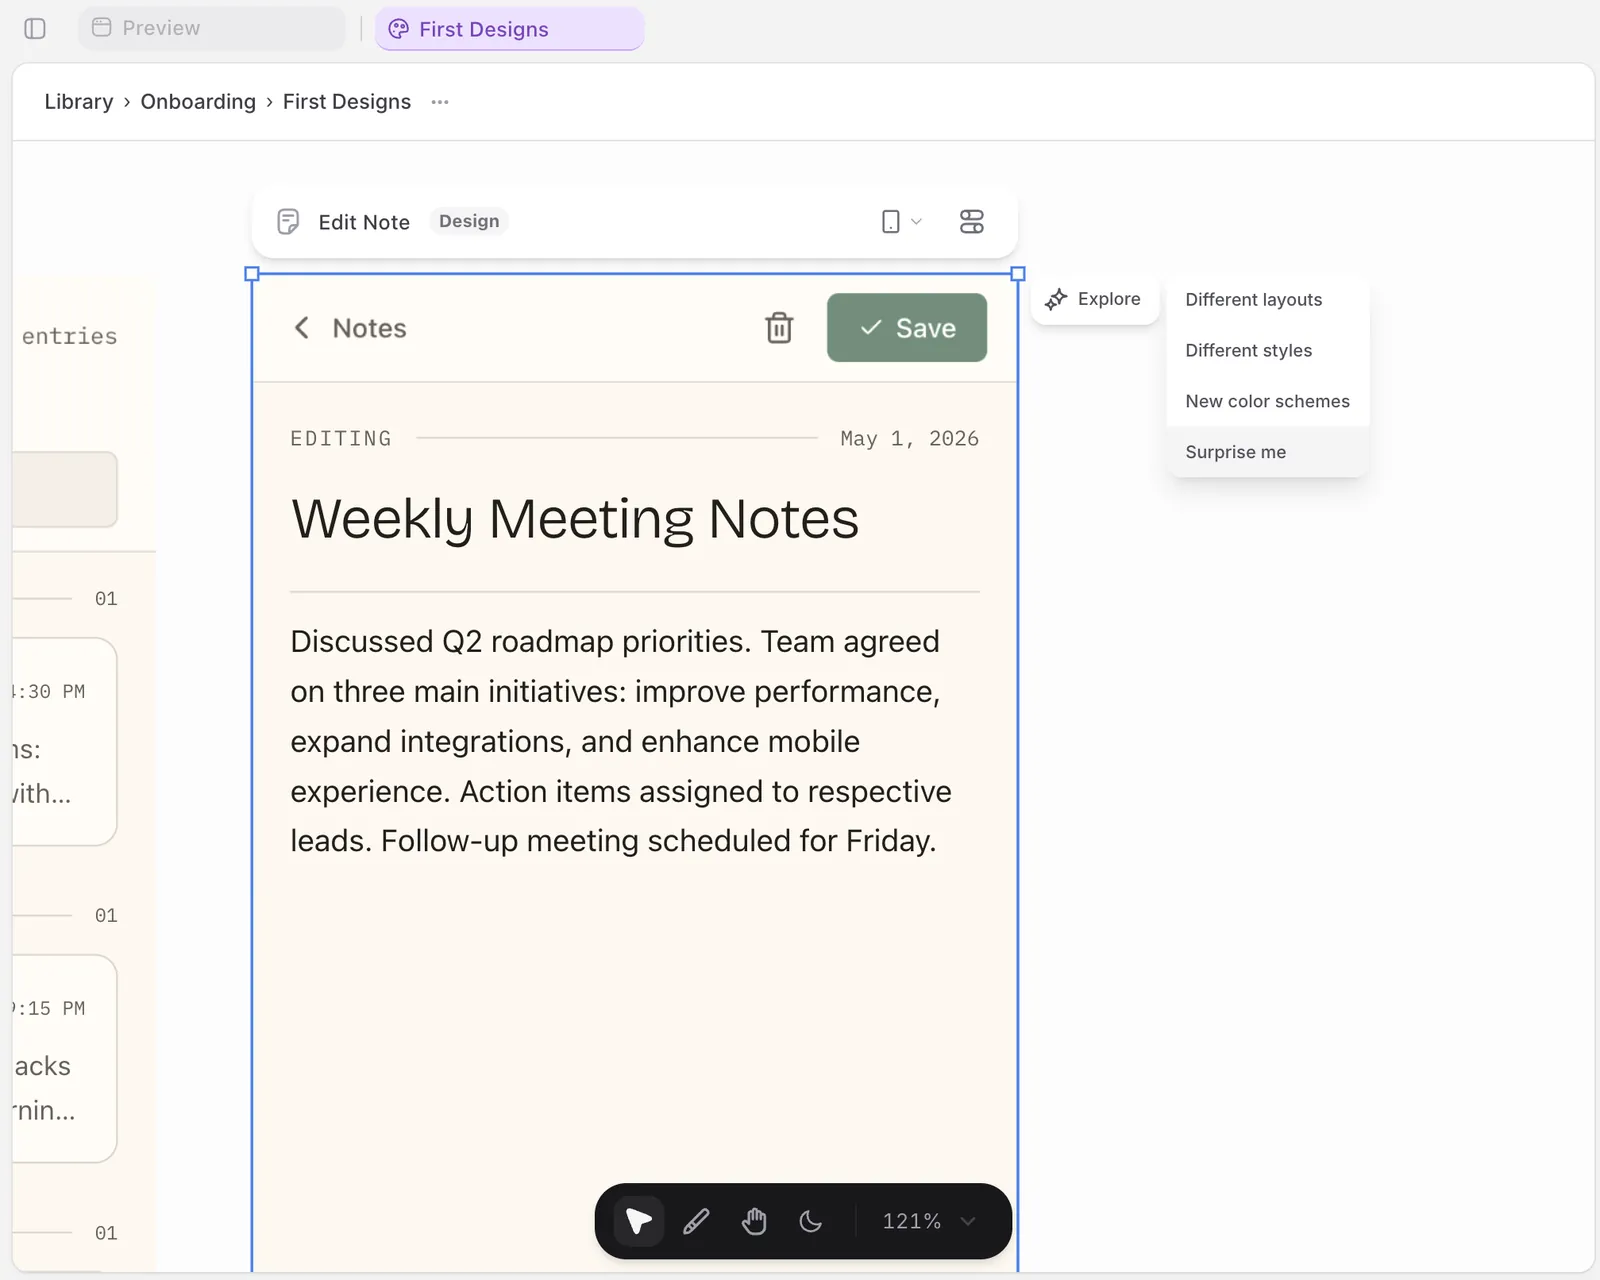
Optionally, select any screen, click *Explore*, and pick from *Different layouts*, *Different styles*, *New color schemes*, or *Surprise me*. Biscuit builds a few variations side by side. Pick the one you like, deselect the rest.
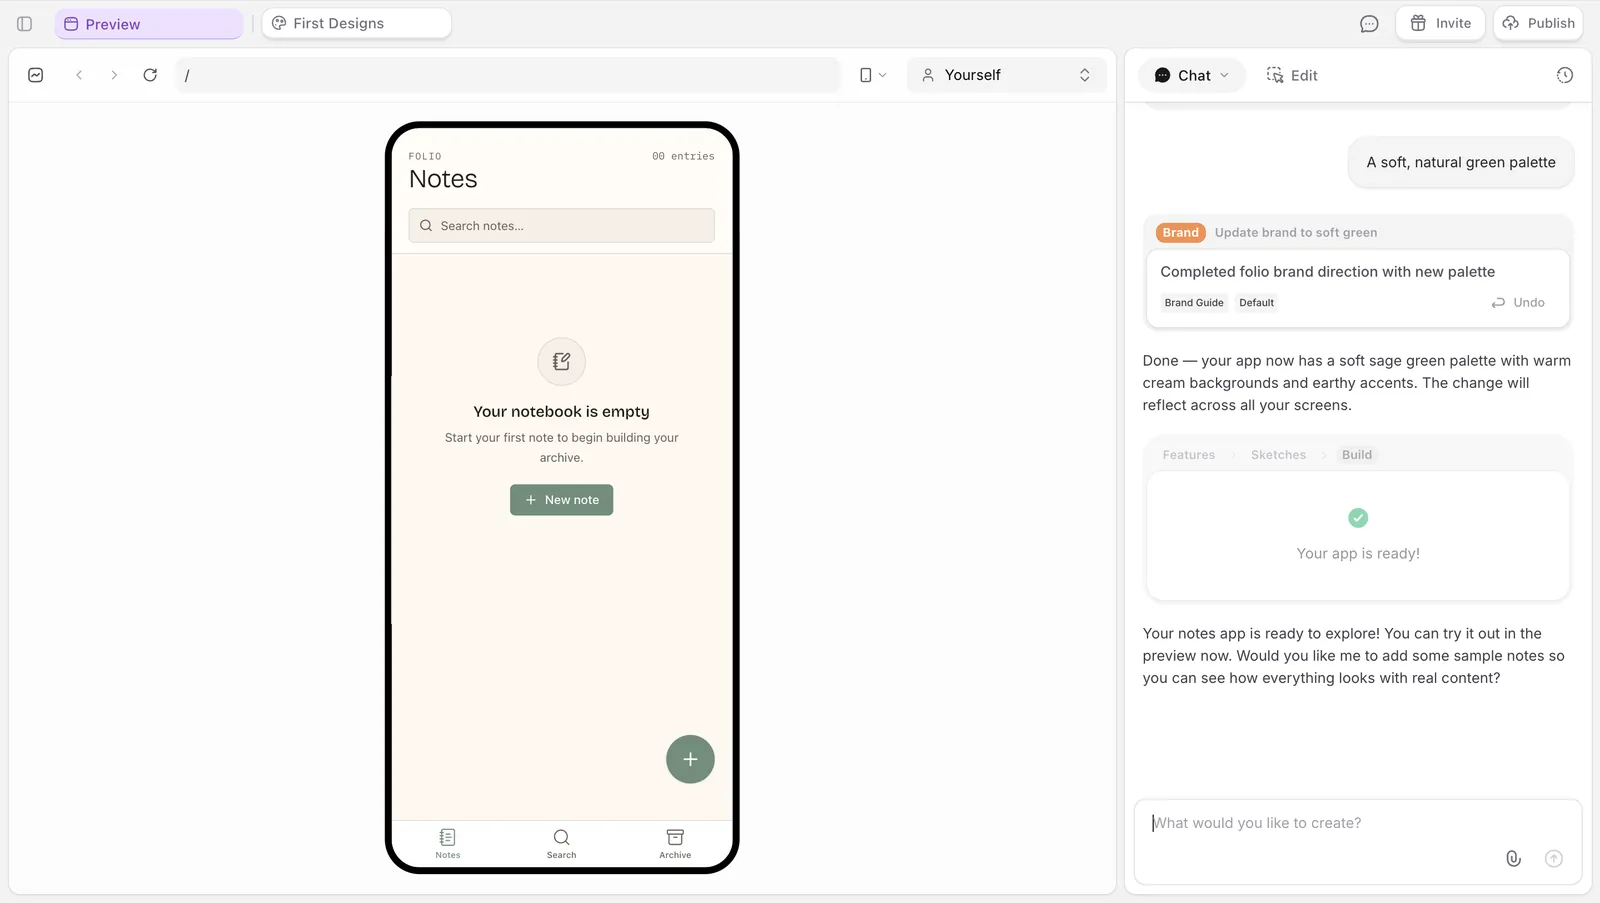
Once the canvas looks right, click *Build*. Biscuit sets up the database, the workflows, and the live version of your app. The canvas turns into a working preview.
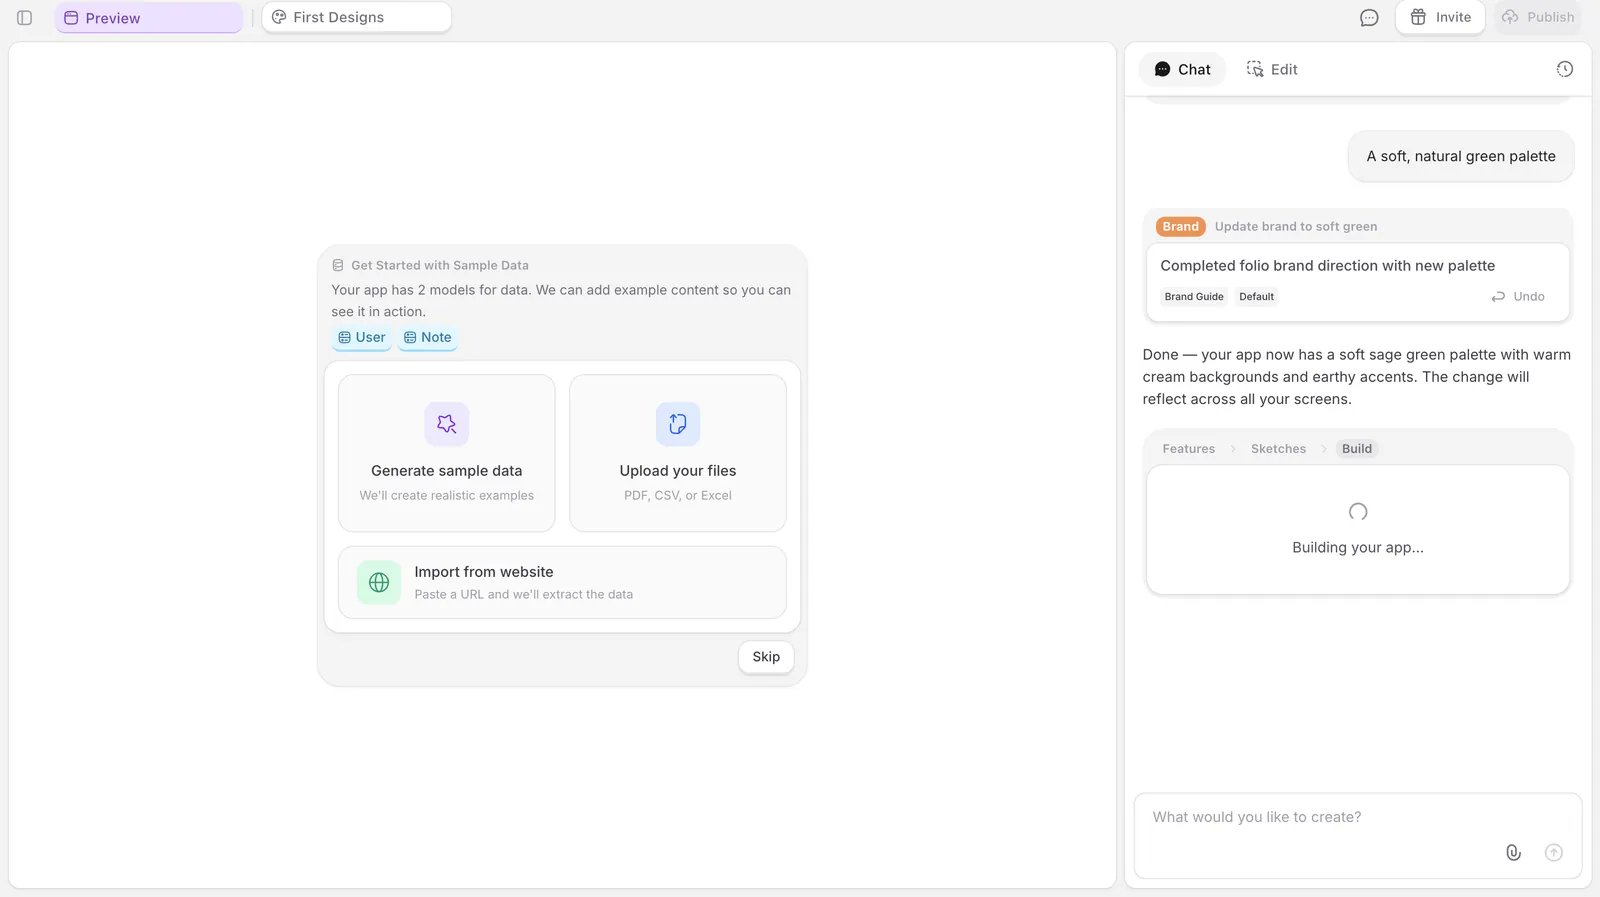
Biscuit asks how to seed the database. Three options:
* *Generate sample data* lets Biscuit populate it for you.
* *Upload your files* takes a PDF, CSV, or Excel file you already have.
* *Import from website* pulls data from an existing site.
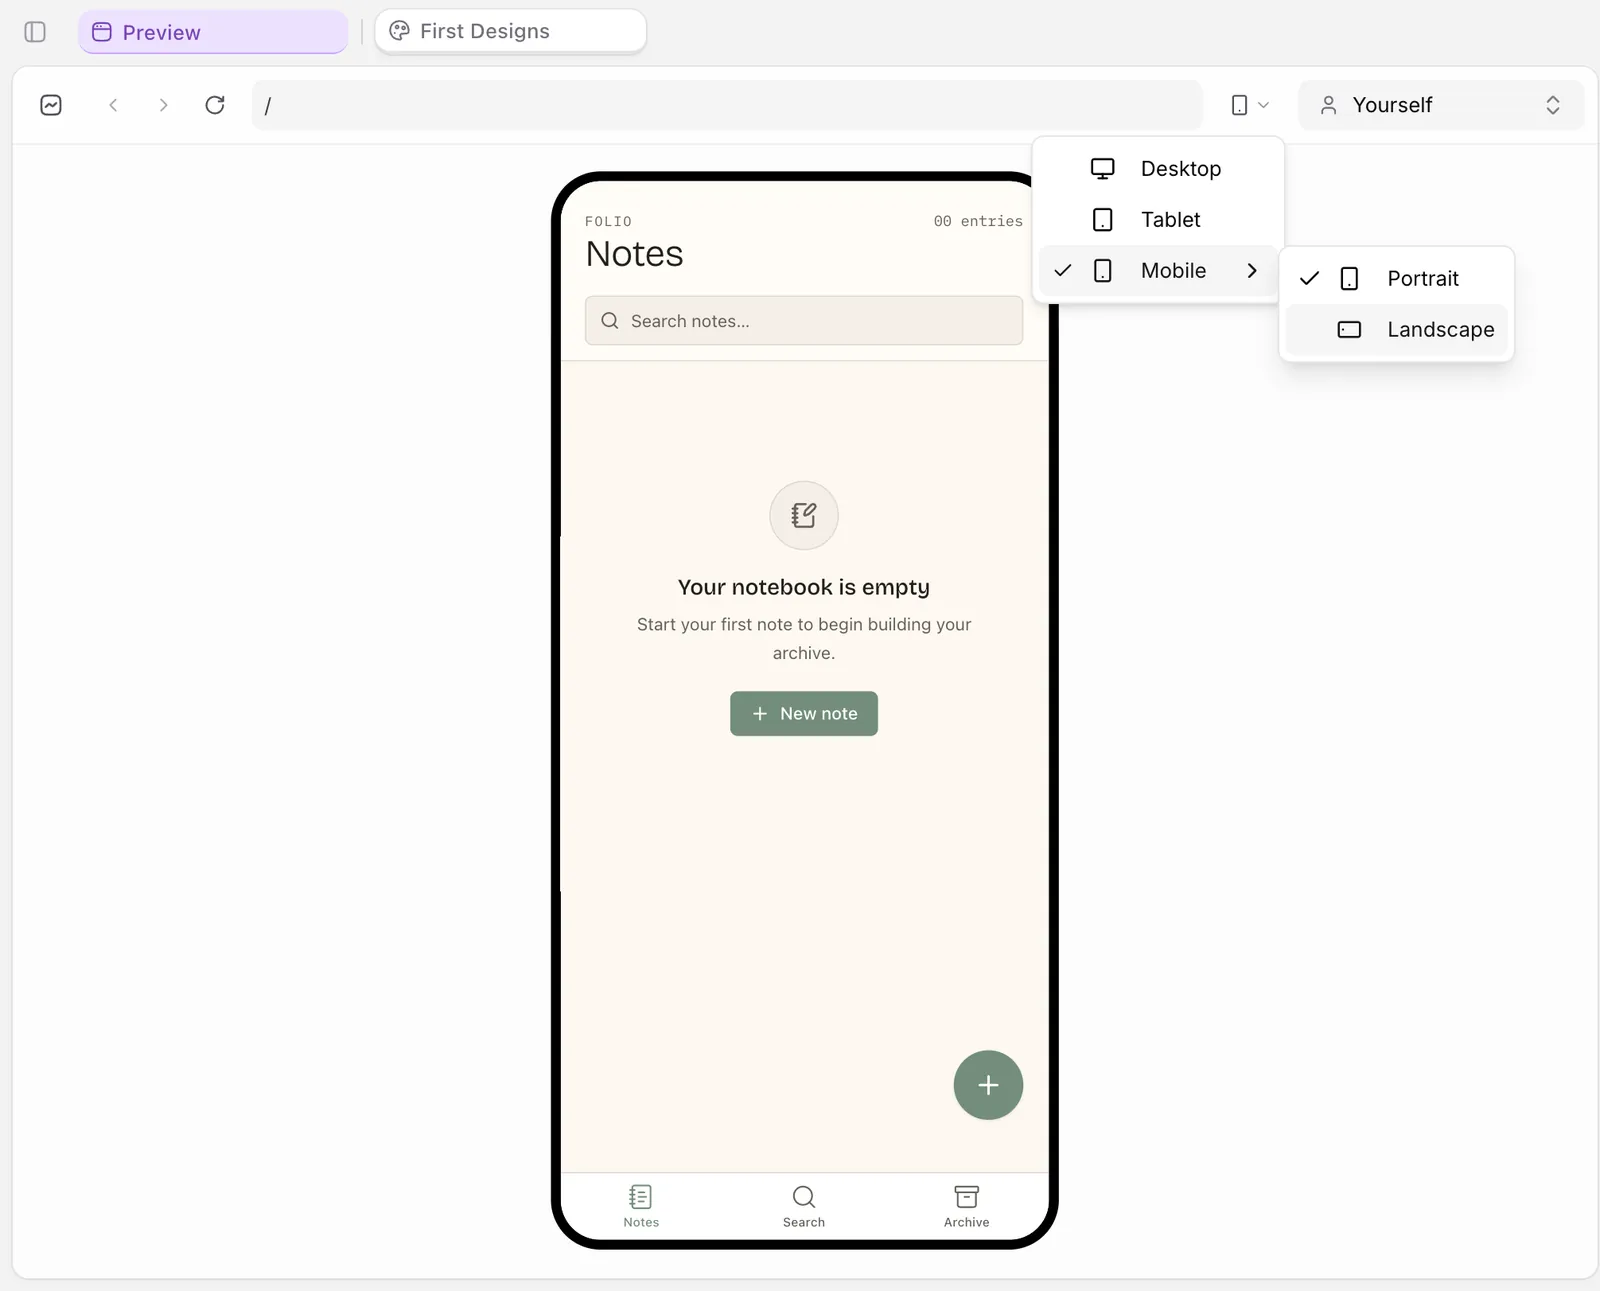
Use the preview to add records, click around, and check that everything works. The view selector at the top lets you switch between desktop, tablet, and mobile, and between yourself, an anonymous user, and another logged-in user.
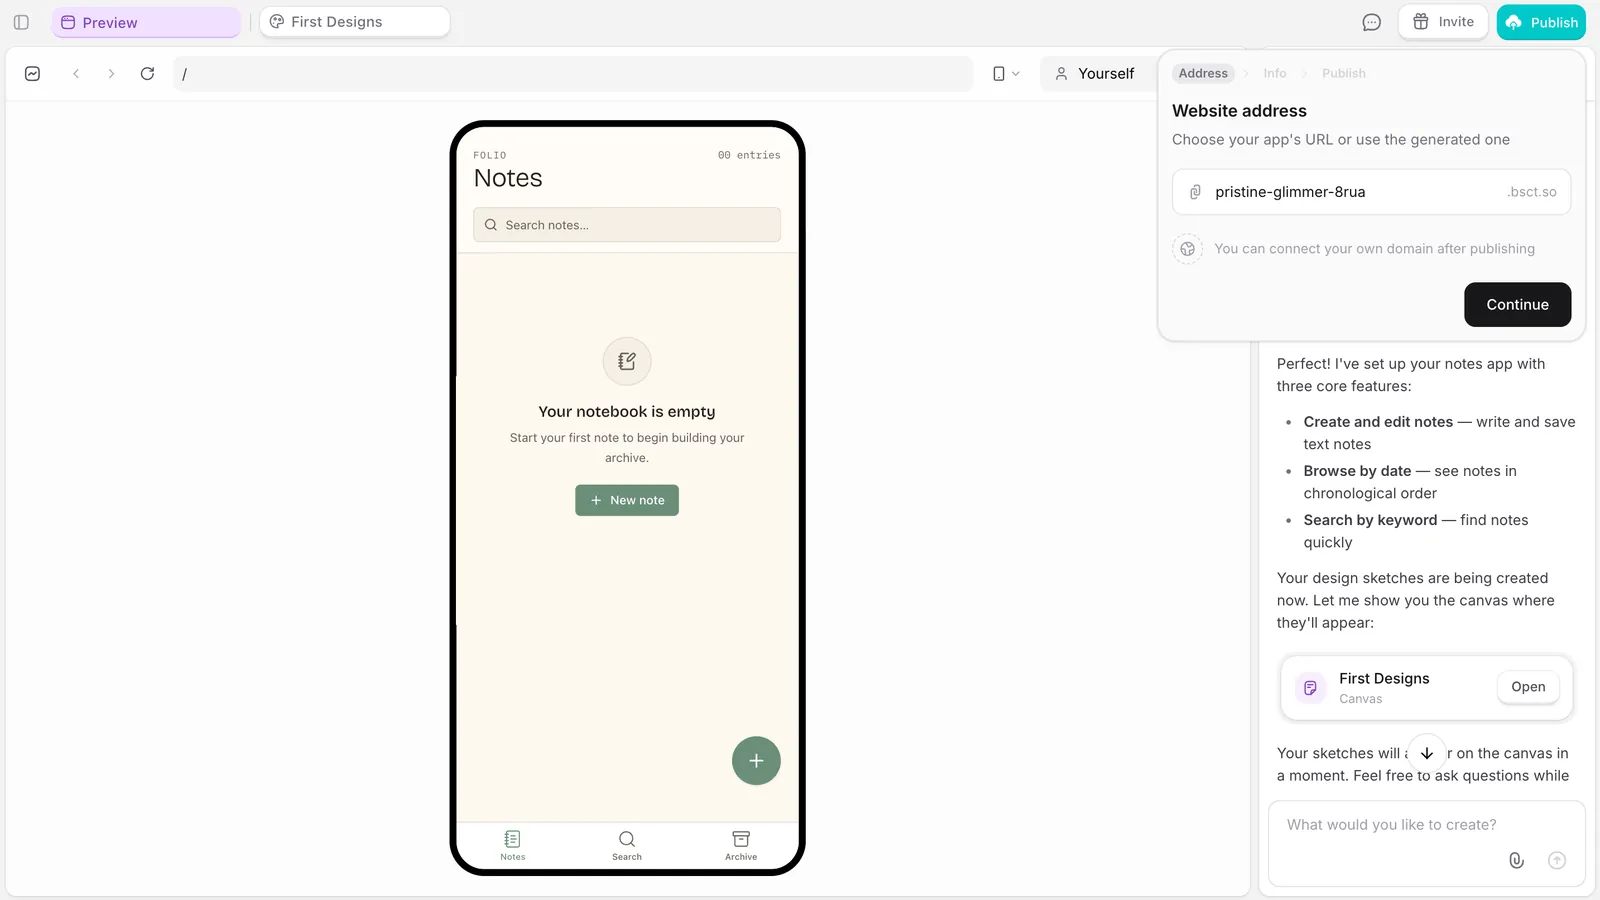
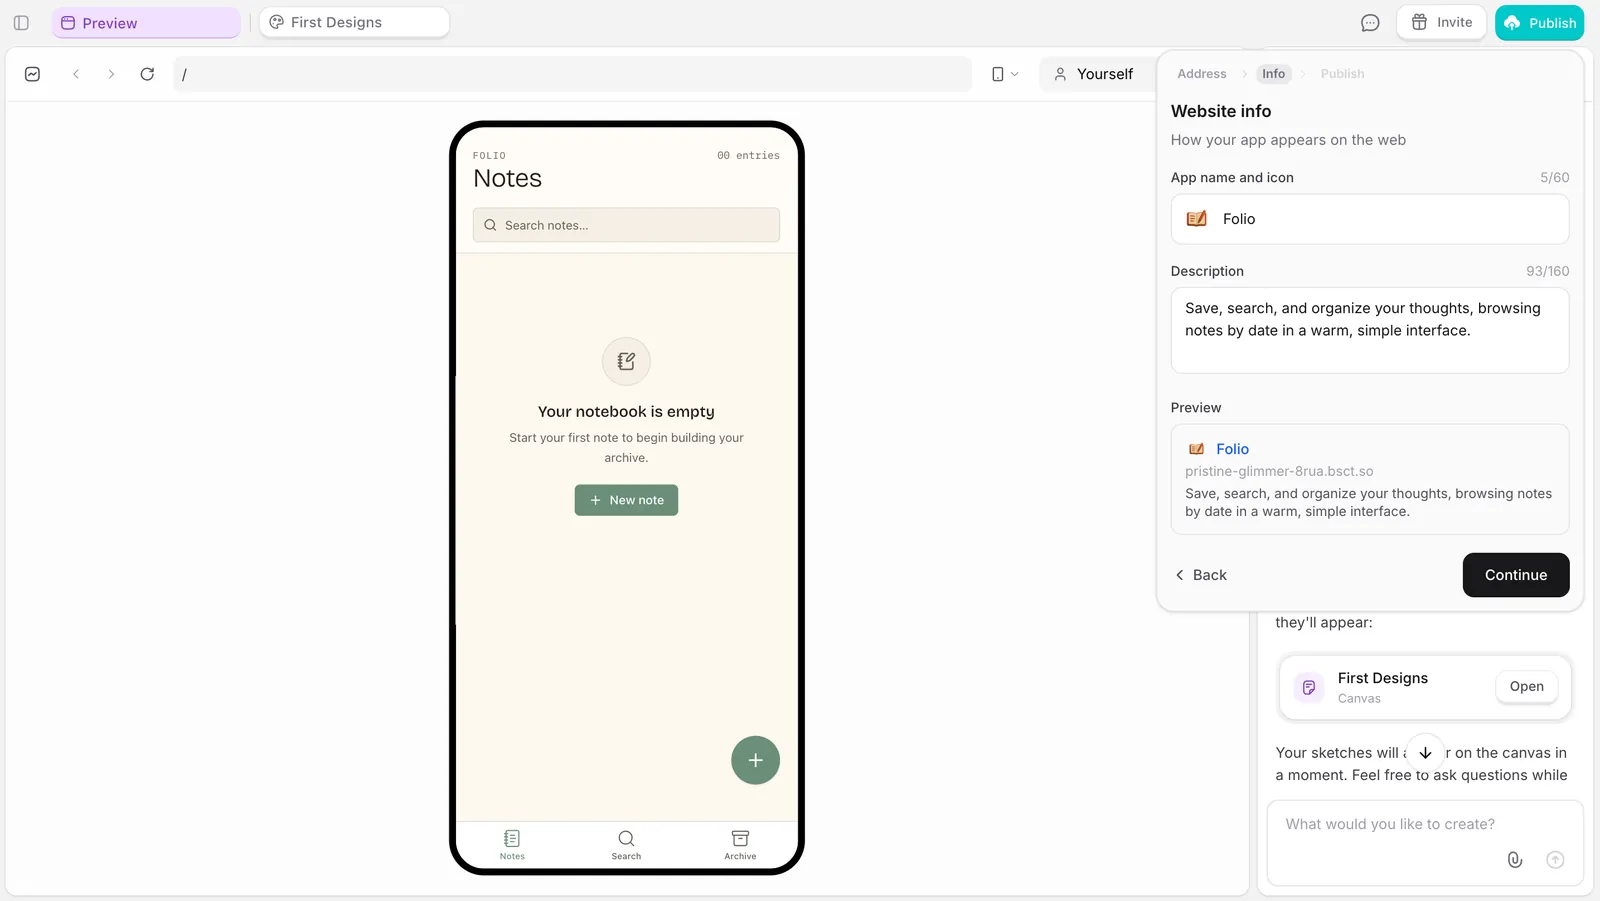
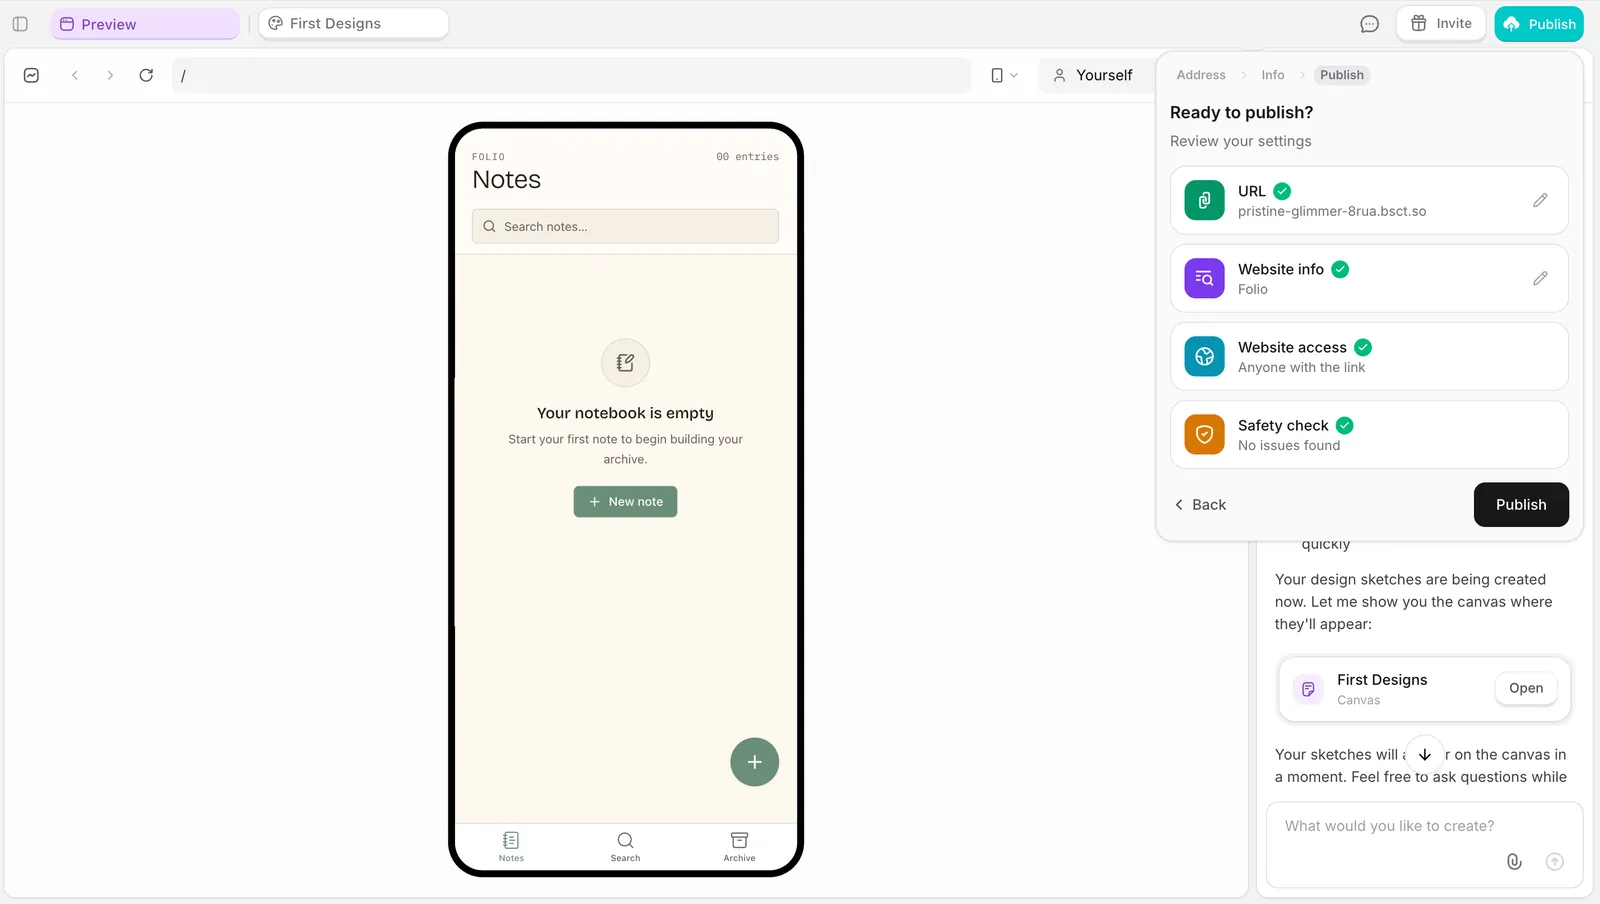
Click *Publish* in the top-right. Biscuit gives you a default URL on the `.bsct.so` domain. Edit the slug if you want a different one, then click *Continue*. Add an app icon, check the website info, and let Biscuit run its safety check. When it passes, click *Publish*, and that's it: your app is live!
Click *Add domain* on the publish screen and enter your domain (e.g. `cardkeep.com`). Biscuit shows the DNS records you need to add at your domain provider ([GoDaddy](https://www.godaddy.com/help/manage-dns-records-680), [Namecheap](https://www.namecheap.com/support/knowledgebase/article.aspx/767/10/how-to-change-dns-for-a-domain/), [Porkbun](https://kb.porkbun.com/article/68-how-to-edit-dns-records), [Cloudflare](https://developers.cloudflare.com/dns/manage-dns-records/how-to/create-dns-records/), etc.). Add them, save, and Biscuit handles the rest.
This connects your domain to your app's URL only. Email continues to use `@apps.bsct.so` for both sending and receiving.
DNS usually propagates within minutes, but can take up to 48 hours. If your custom domain still isn't connecting after that, check the records at your provider match what Biscuit shows.
## FAQ
Don't restart. Use chat to correct it ("the homepage should show a list, not a grid", "remove the search bar"). Each correction goes into the project history.
Open chat and prompt for it. If the feature exists in Biscuit (payments, emails, workflows, custom domains, file uploads), Biscuit configures it. If it doesn't, Biscuit tells you.
DNS usually propagates within minutes, but can take up to 48 hours. Check that the records at your domain provider match what Biscuit shows on the publish screen. If they do, give it time.
## Up next
Every Biscuit app has a built-in database.
Take real payments from real customers.
Pull live data from any service.